Check out my Ebay auctions!
Friday is the day I share links, Ebay related or not. Here are my favorites from the week.
First of all I want these shoes! I just don't have it in my budget to buy 'em!
I just discovered Couroc trays a few weeks ago when I found a few at the warehouse. This Ebay guide has lots of cool pics and a brief history of Couroc trays.
My favorite vintage maven, Super Kawaii Mama, does a fabulous job of glamming up gals retro style and proves it right here.
That's all I have, enjoy your weekend!
CHECK OUT MY EBAY LISTINGS
 
|
Friday, April 29, 2011
Wednesday, April 27, 2011
Taking Pictures of Small or Difficult Marks
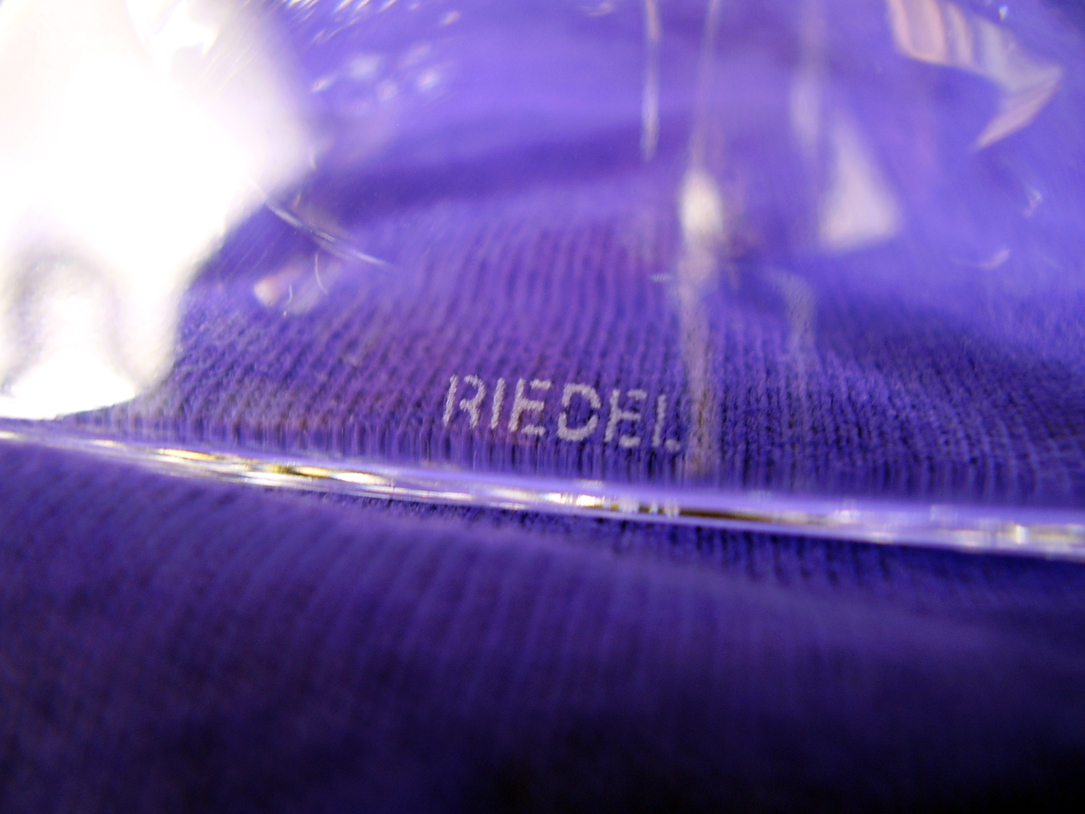 |
| Markings on Glass can be Difficult |
It can be difficult to capture some markings on jewelry, glass, and porcelain since they are usually etched or engraved very small and with little color differentiation. Putting images of these marks on your listings will give buyers the confidence to bid on your Ebay items instead of passing you over. I'll give you a few tips that should help you get these markings in most situations.
The first absolutely essential is to use the macro or super macro mode on your camera. Take a look at your user manual or play around with the camera to find the setting. On my cameras, it's indicated with a flower symbol. Your manual will also help you figure out the distance for which you need to use the macro setting in order for the camera to focus.
Most digital cameras should have this feature, even the basic models. I have a digital SLR as one of my cameras, but it's older and needs a special lens to get really close, so this is where the manual will come in handy as to letting you know if your camera is capable.
The next thing you must do is gather lots of light. If it's nice outside, that's a great place to take pictures. Otherwise, since the area you're working with is small, you should be able to gather enough lamps together and point them at the same place. Studio in a box works well, but you still may need an additional lamp.

If what you're shooting is clear (like the glass picture above), you'll want a background that pops the marking. In this case, I used a purple t-shirt. White probably would not have worked, and a really dark color could have make the marking darker. If you're just starting out, try a few different fabrics or paper to see what works.
You can use a tripod to keep the camera steady, but I find it's not really necessary if you have enough light. It's best not to use zoom when you are first starting out because it will alter the resolution of the image. You might decide to use it later after you get more experienced, but initially you just get as close to the item as you can. Most digital cameras have you push the shutter button halfway to focus (make sure you're using auto focus) and will beep or otherwise indicate you've successfully focused. If the camera will not focus, try backing off a little and see if that helps, you may be out of the range of possible distance. Keep backing off until the camera focuses. Once you get a lock on the item, finish taking the picture. You might want to take a couple more at this point.
Sometimes you are dealing with very light markings that the camera's auto focus doesn't pick up. In this case, I'll take a little piece of paper with typing or dark writing on it and put it in front of the mark (make sure the paper is actually touching the object), focus the camera, then remove the piece of paper. Make sure the piece of paper doesn't take up the entire frame or else the brightness of the final picture may end up being too dark.

If I can get a picture of the item in focus, but it's just too vague, I may sharpen and enhance the contrast a bit in Photoshop (or whatever your image editing software of choice is). When I do this I will disclose in the listing that the marking was enhanced to make it more visible.
And sometimes, although I hate showing off my bad (or nonexistent) manicure, I hold the item so I can angle it to the light to make the marking stand out. I try to keep as little of my hand out of the picture as possible. Obviously, I didn't do a great job of in this example.
Hope this helps and please feel free to share your tips as well!
Monday, April 25, 2011
Single Earrings Sitting in a Jewelry Box?
 |
| Gold & Pearl Single Earrings |
Hey everybody, If you think your single earrings are worthless, you'll find that there are many applications for these beauties. This picture contains some really pretty pearls along with some gold filigree and enameling that are just too good to scrap. People buy single earrings to make them into necklaces (easily done by adding jump rings to the sides and attaching a chain) or disassemble and use for other jewelry.
These particular earrings are all 14 karat gold with pearls (and of course, the enameling on the one earring). They sold for $151.49 on Ebay. So, not junk, right?
If you decide to sell your craft (or sadly, as some will view it, scrap) jewelry on Ebay, here some tips that should get you maximum dollar:
- First the obvious advice. Take clear pictures of the front and back in adequate lighting. If you don't have good lighting for taking pics in your house, take them outside on a moderately bright day, sometime before or after noon. Use a plain background unless you really know what you're doing.
- In your title, you want to cram as many search words in as you can while still making sense. In this case, you want to attract people who will buy the jewelry for crafting or scrap. People will probably be searching specifically for gold. This is the title I came up with for this lot: 14K Yellow Gold & Pearl Craft Scrap Single Earring Lot. You can also search completed listings on Ebay for ideas (you must have an account to do this). Just make sure you get ideas from items that sold well :).
- Take a picture of the jewelry on a scale. If there are any gold-only items, you should take another picture of the gold-only items on the scale. Your buyers don't know you, therefore you have to provide evidence that you are trustworthy.
- Use your macro setting on your camera if you have it to take pictures of any designer, maker, or (probably most importantly), gold content markings. Whether or not you are able to get pictures of the markings, list every single marking on your listing. It can be difficult to take pictures of those tiny marks. I'll share in another post some tips for taking pics of tiny and hard to see markings.
Of course, I'm always happy to sell or teach you to sell your stuff for you as well. Just contact me at marija@nazaza.com.
Thursday, April 21, 2011
Hello from Nazaza's Finer Things

Mary Hoyer Doll
This is my first post for Nazaza's Finer Things. I am a collectibles, vintage, and antique dealer specializing in consignments and training folks to sell their own stuff on Ebay or through other venues. One of the things I love about doing this is the sheer variety of stuff that I come across. I also relish finding a home for forgotten items, and items needing TLC to be restored to their former glory!
This is my first post for Nazaza's Finer Things. I am a collectibles, vintage, and antique dealer specializing in consignments and training folks to sell their own stuff on Ebay or through other venues. One of the things I love about doing this is the sheer variety of stuff that I come across. I also relish finding a home for forgotten items, and items needing TLC to be restored to their former glory!
I'll be heading to "the warehouse" here shortly to see what kinds of goodies they have in store for me! I'll explain about the warehouse in a future post.
I'll leave it at that for now. I look forward to sharing my experiences with you!
Subscribe to:
Posts (Atom)